Advanced Trains
This mod aims to provide realistic, good-looking and functional trains by introducing a revolutionary rail placement system. It features several wagons that can be coupled together.
This mod is not finished. If you miss features, suggest them, but do not denounce this mod just because they are not yet implemented. They will be. Placing Rails
Minetest’s in-house rail system features rails that turn at an angle of 90 degrees – totally impractical for the use with realistic trains. So we have our own rails. Remember: Carts can’t drive on the rails provided by this mod, as do trains not drive on minetest’s default rails because of their different track widths.
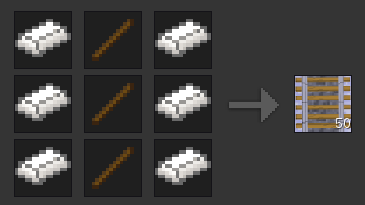
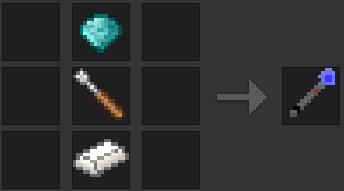
First, craft some rails.

Now, place one at any position and another one right next to it: you have made your first railway track!
To learn how to make turns have a look at the following examples. A rail node has been placed only at the red-marked places.
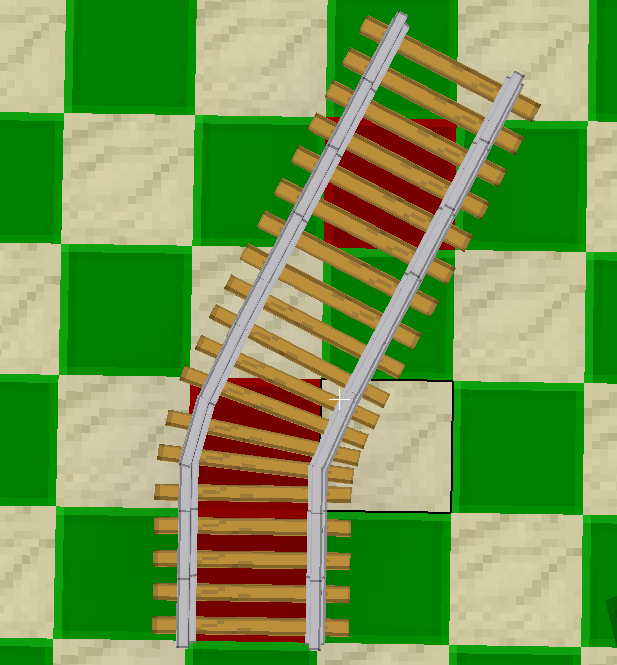
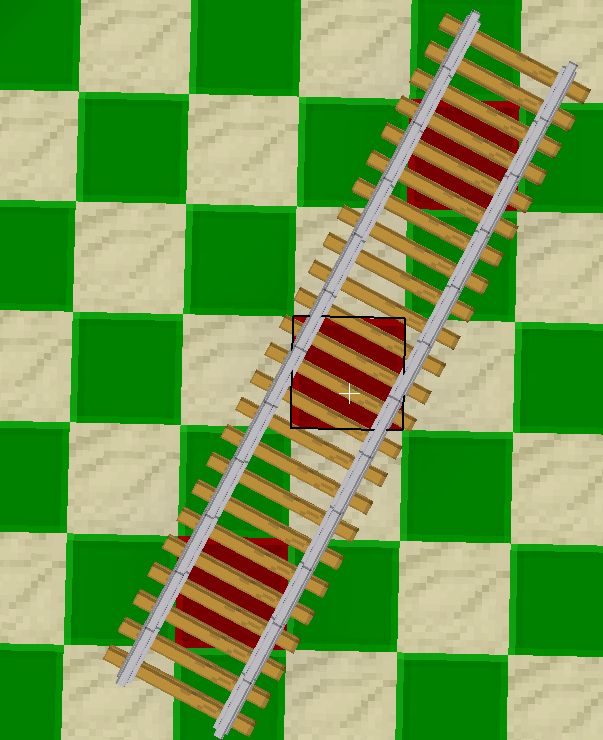
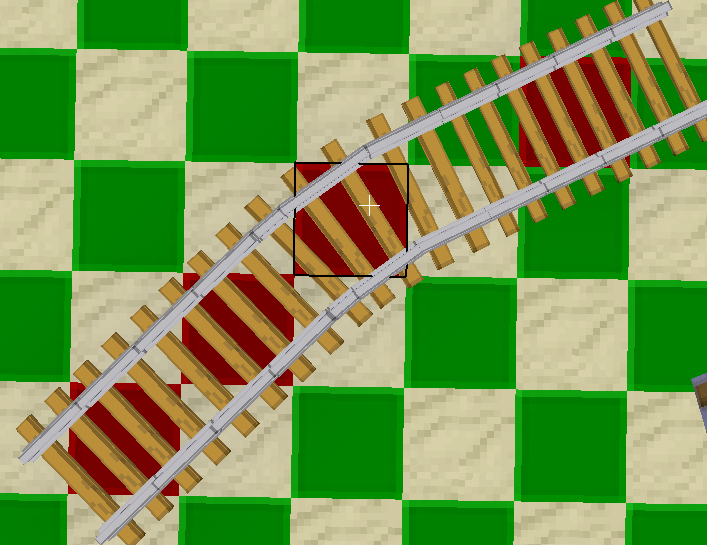
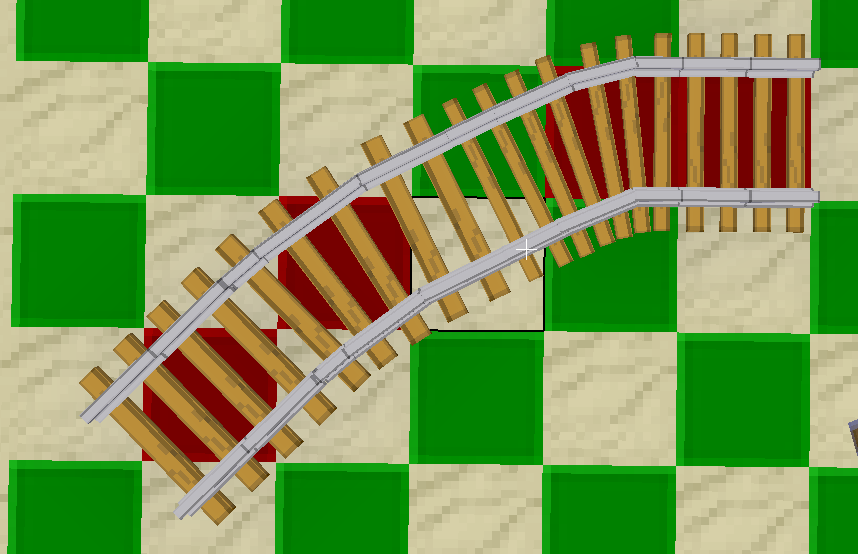
As shown in the illustrations above, the 30-degree angled rails use a knight’s move (2 ahead, 1 aside) for placement. For the rails to look realistic, I encourage you not to build turns that are too narrow. IMO the angles you can build with this are still way to narrow, but this is the best compromise I can find.
Switches
To create switches we need the trackworker tool. ATM it looks like a Doctor Who Sonic Screwdriver. Aside from turning rails into switches, it is also capable of rotating everything (rails, bumpers, signals) in this mod. Due to internal mechanics, nothing can be rotated using the default screwdriver.
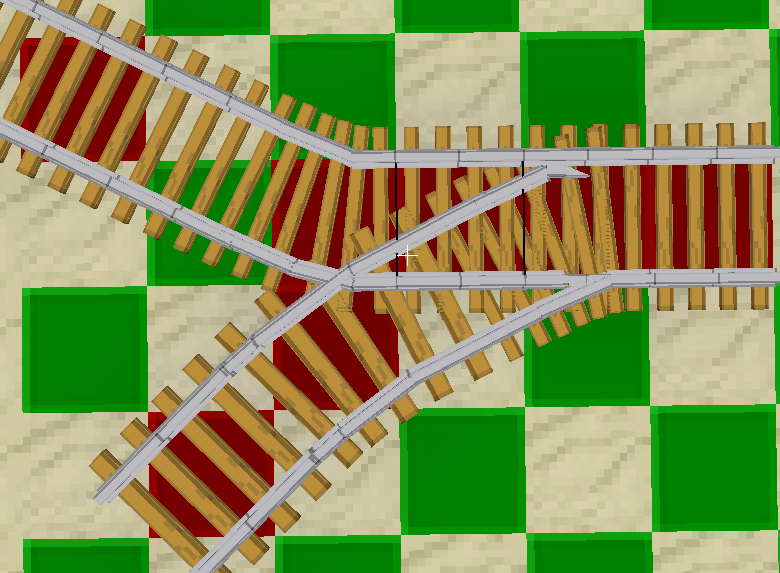
Place some rails. Then left-click 1-2 times on one of these rails, until you see a switch. Use right-click to rotate it how you need it. You can change the switch direction by right-clicking the switch or by powering it with mesecons.
Unfortunately tracks that are placed next to switches don’t always automatically connect to them. You need to correct manually using the Trackworker. One day I will implement proper handling for these. When you are finished it could look like this:
Rail crosses
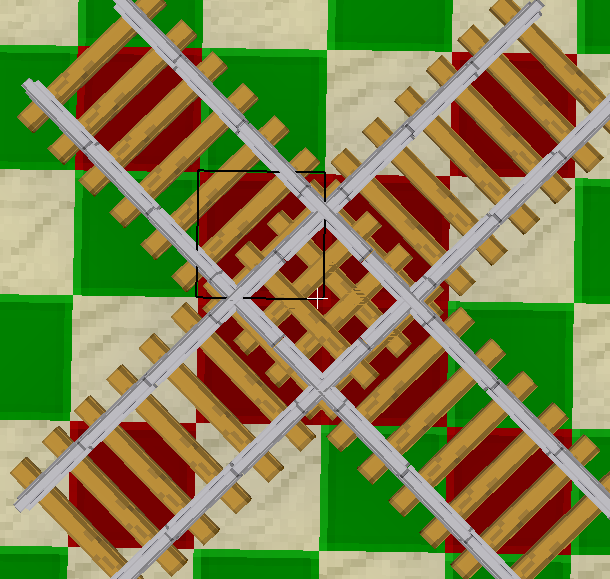
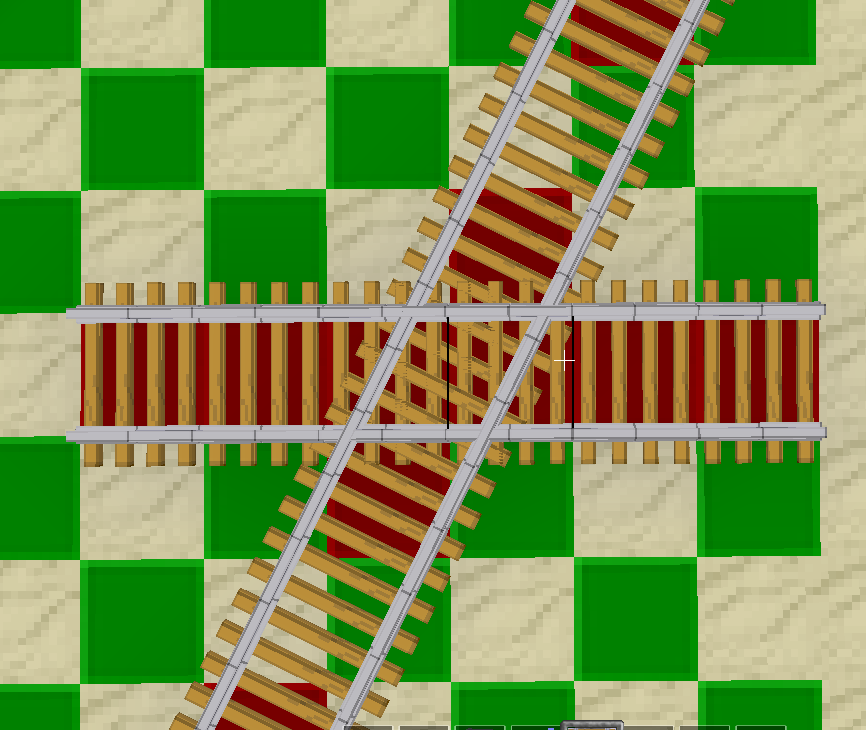
There are no real cross-rail nodes. However you can create crossing rails by being creative and using the knight’s move or by placing opposing 45-degree rails.
Height differences
To master height differences you can craft slope nodes:
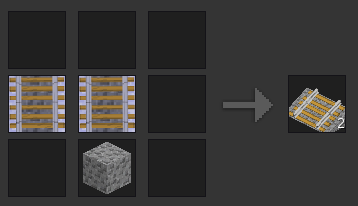
To place them, you have to prepare the base, then stand in the right direction and point to the slope start point, then place it. A slope will be constructed in the direction you are facing (45 degree steps) leaned against the next solid node. The right number of slopes is subtracted from the item stack if you are in survival.
Bumpers, platforms, signals and detector rails
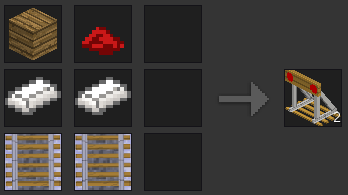
Bumpers are objects that are usually placed at the end of a track to prevent trains rolling off it. After placed, they can be rotated using the Trackworker.
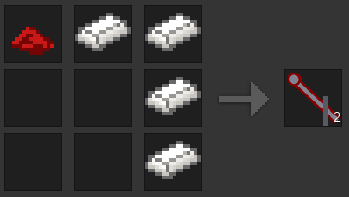
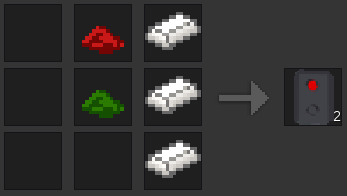
These are a regular analog signal and an electric signal. Like everything, you can rotate them using the Trackworker. Right-click or power with mesecons to signal trains that they can pass or have to stop. The signals do not have any effect on trains, they can only signal the driver. A more advanced signalling system (with distant signals/signal combinations) is planned.
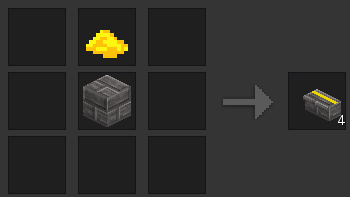
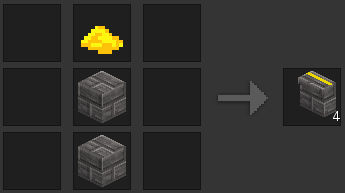
These are some platform nodes. I suggest using the left one, it’s only half height and looks better. These nodes also have a sandstone variant, craft with sandstone bricks
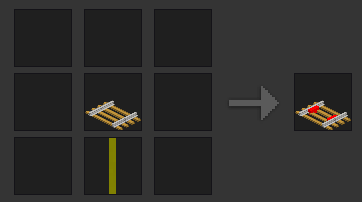
These detector rails turn adjacent mesecons on when a train is standing/driving over them.
Notice: Detector rails and bumpers currently aren’t aligned to the regular tracks. This will be fixed soon. Meanwhile, you need to rotate them manually.
Trains
There are some wagons included in this modpack, however community members (namely mbb and Andrey) have made some more wagons that can be downloaded and enabled separately. Visit the forum topic (https://forum.minetest.net/viewtopic.php?f=11&t=14726) to download them.
To see what’s included, look up in a craft guide or consult the creative mode inventory.
To place wagons simply craft and click a track. To remove a wagon, punch it. Only the person who placed the wagon can do this. In survival if you destroy trains you get only some of your steel back, so you will be asked to confirm if you really want to destroy a wagon.
Driving trains
Right-click any wagon to get on. This will attach you to the wagon and register you as passenger. Depending on how the wagon is set up, you are either in a passenger seat or inside a driver stand. Right-clicking again will show your possibilities on what you can do in/with the wagon.
Example:
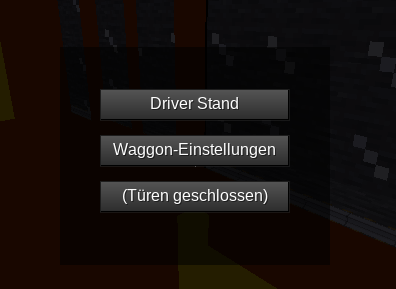
When entering a subway wagon, you are formally inside the passenger area. You can see this by the fact that there’s no head-up display. Right-clicking brings up this form.
The first button will make you move to the Driver stand, so you can drive the train.
The second button should say “Wagon properties” and appears only for the wagon owner. See “Wagon Properties”.
The last button tells that the doors are closed, so you can’t get off at this time. If the doors are open or the wagon has no doors, this button says “Get off”.
It is always possible to bypass closed doors and get off by holding the Sneak key and right-clicking the wagon or by holding Sneak and Use at the same time. Remember that this may result in your death when the train is travelling fast.
The Japanese train and the Subway train support automatic getting on by just walking into the wagon. As soon as you stand on a platform and walk towards a door, you will automatically get on the wagon. On these, pressing W or S while inside the Passenger Area will also make you get off.
Train controls
If you are inside a driver stand you are presented with a head-up display:
The upper bar shows your current speed and the lower bar shows what speed you ordered the train to hold. Assuming you have the default controls (WASD, Shift for sneak, Space for jump), the following key bindings apply:
Coupling wagons
You just learned how to drive an engine. Now place a wagon anywhere and drive your engine slowly towards that wagon. As soon as they collided your engine will stop. Now get off and right-click the green icon that appeared between the engine and the train. You have coupled the wagon to the engine.
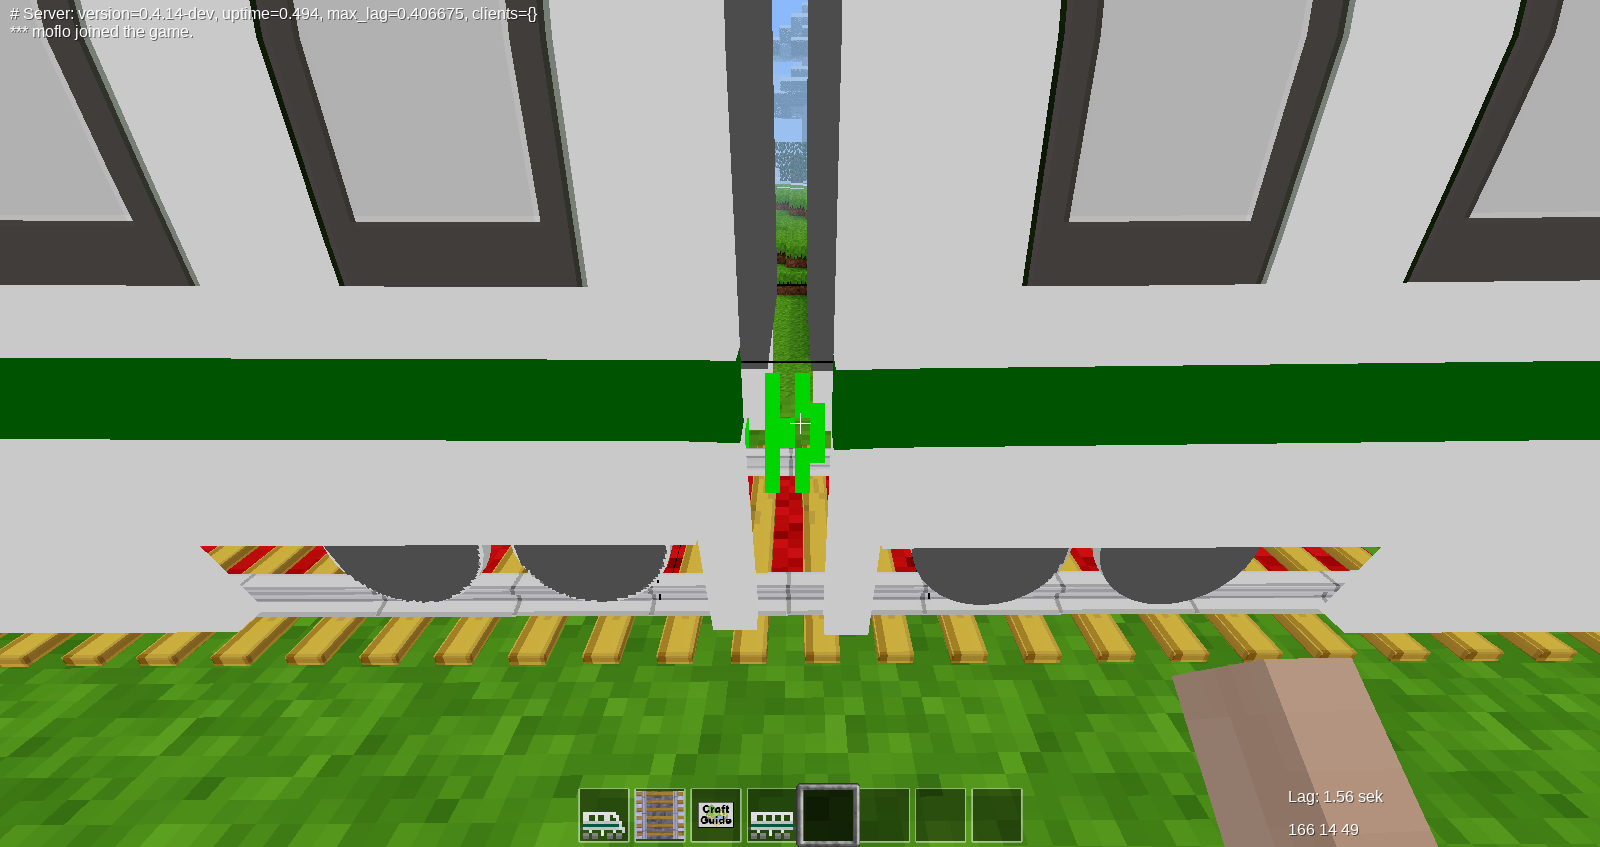
To discouple a wagon, punch the red icon between the wagons you want to discouple while the train is standing.
Automatic Train Control (ATC)
ATC rails allow you to automate train operation. There are two types of ATC rails:
Regular ATC
The ATC rail does not have a crafting recipe. When placed, you can set a command and it will be sent to any train driving over the controller.
Only the static mode is implemented, changing the mode has no effect.
For a detailed explanation how ATC commands work and their syntax see atc_command.txt
Note: to rotate ATC rails, you need to bypass the formspec that is set for the node. To do this, hold Sneak when right-clicking the rail with the trackworker tool.
LUA ATC
The LUA ATC suite is part of the mod advtrains_luaautomation. The LUA ATC components are quite similar to Mesecons Luacontrollers and allow to create all kinds of automation systems. This tool is not intended for beginners or regular players, but for server admins who wish to create a heavily automated subway system.
More information on those can be found inside the mod directory of advtrains_luaautomation.